Part 3: Character Building
Introduction
Welcome to the THANO$VIB$ Beginner's Guide! This is the third of four parts, which provides a look at the various aspects of character building.
This guide has been created for Update 11.6.5 - "Marvel Cosmic Invasion". If this is outdated, look for a newer version at thanosvibs.money/beginners.
Made by DUBU, Astrospeedyjm, Ren Vader, wavegangse, Chaebae and anuswarp.
Basics
Basics
This section of the guide walks through the various upgrade components of a character, from top to bottom as they appear on the character screen.
As most of the game revolves around PvE, most sections of this guide will assume you are building for PvE. However, there is a section at the end about PvP builds.
Build Order
Generally, building a character involves going through the following steps. You might want to come back to this part after reading through the below sections.
1. Upgrade all useful skills to Level 6. Keep any stat buffs gained from these skills in mind when going down this list - stat buffs with a timer on active skills do not appear in the character stat details page, so if a character has (for example) 50% Critical Rate on the details page and 30% from a buff, they are already over cap (80% total, capped at 75%).
2. Pick a viable Custom Gear and equip it.
3. Roll one of the three Attack ISO sets and activate the Set Bonus.
4. Use 4th gear option, Urus, and potentially Uniform Upgrades to fine-tune your stats and ensure the most important ones are capped.
5. Once you have the relevant resources, look into Type Enhancement and Artifacts.
Stats
Stats
A lot of the components of character building revolve around increasing or capping stats that can be found on the character's Details page. This section will provide a description of each stat.
Attack
Attack comes in three types: Physical Attack, Energy Attack and All Basic Attacks. If you have All Basic Attack +200, this is the same as Energy Attack +200 and Physical Attack +200. The "Basic" word is to distinguish it from Instinct Attack, which you don't have to worry about yet.
The vast majority of characters use a single Attack type - the stat shown first on their Info page.
For a character that uses Energy Attack only, Physical Attack is a useless stat, and thus All Attack +x% is just as useful as Energy Attack +x%. The opposite applies for Physical Attack characters.
Don't get confused by Energy/Physical or Elemental *Damage* - Attack and Damage are two separate things. Attack is a stat that gets converted into Damage. Many characters will deal both Physical and Energy Damage depending on the skill, but it will all be based on the same Attack stat.
For example, the below skill deals Energy Damage, but based on Physical Attack. So you would build this character for Physical Attack, not Energy Attack.
Attack and Movement Speed
Attack Speed increases the speed of your skill animations. This is quite an important stat.
Movement Speed increases the speed of your regular joystick movement. This is not important at all.
Critical Rate and Critical Damage
Critical Rate boosts your chance of a crit, in which the Critical Damage multiplier is applied to your damage number.
Critical Rate is not what it seems however: it is often subject to a level-based reduction relative to the opponent you are fighting. Don't worry too much about the details of this, but generally assume your actual Critical Rate is half of what is shown on the Stats page.
Although your Critical Rate is reduced in this way, the 75% Critical Rate cap is applied to the stat before the reduction. So even if your Crit Rate is reduced 50%, it doesn't mean you can have 150% on the stats page and have this reduced to 75% in a battle - you'd still have 75% reduced to 37.5%.
An additional stat, Guaranteed Critical Rate, is added in some passives. This is a true Critical Rate without level penalties.
As such, your actual chance of critting in a fight is:
Guaranteed Critical Rate + (Critical Rate * Level Penalty)Ignore Defense
Not sure if anyone knows what this does, just that it's good and makes you deal more damage. Try and cap it as best you can.
Ignore Dodge
If an enemy would have dodged your attack, you have an (Ignore Dodge)% chance of hitting them anyway.
There is no known cap on Ignore Dodge, but there is an intrinsic limit on its usefulness at 100%.
Elemental Damage
"Elemental" refers to any of Fire, Cold, Lightning, Poison or Mind Damage. These are baked in to certain characters' skills - adding Fire Damage to a character with no Fire Damage on their skills does nothing.
It is also important to note that Elemental Damage is a modifier, not a distinct damage type. This means that any Elemental Damage still has an underlying Physical or Energy Damage - just with an additional Elemental property.
When building characters or teams, getting multiple Elemental Damage buffs from different sources is unideal, as Elemental buffs are additive to one another. For example, say you have a character with 30% Fire Damage on their passive, and they have a skill that deals 100 Damage.
- If you add a 60% Fire Damage lead, you do 100 * (30 + 60)% = 190 damage.
- If you add a 60% regular Damage lead, you do 100 * 30 * 60 = 208 damage.Defense and HP
Defense is largely useless in this game.
HP (sometimes called Max HP) is worth building for rare characters who scale their damage based on HP (e.g. Titan Hulk, Immortal Hulk, Victorious), or for extremely tanky PvP characters (e.g. Gilgamesh, Sentry). HP is an important stat for a PvP-centric account, and should be prioritised - but as most people do not build their whole accounts for PvP, it is low priority in most cases.
Recovery Rate
If you have a skill that heals you, Recovery Rate is a multiplier that increases the amount of healing you get. If you have 250% Recovery Rate (the maximum), your character will heal 2.5x as much.
Some characters also have a Recovery Rate multiplier that increases the amount of Recovery Rate they get, kind of like how Recovery Rate works with heals. Don't worry about this too much, but if a character is gaining more Recovery Rate than expected, this is probably why.
Note that Recovery Rate does not apply to heals from abnormal sources, such as Charm.
Dodge
The chance of Dodging an attack. However, it is subject to the same level-based reduction as Critical Rate, and also has a Guaranteed counterpart (Guaranteed Dodge) that escapes this reduction.
Skill Cooldown
Reduces the cooldown of your skills. Characters are designed around 50% (max) Skill Cooldown, so it is crucial that this is capped (or very close to cap) for all characters you want to use.
Elemental Resist and Reduce Debuff Duration
Elemental Resist reduces the amount of damage you take from the respective Element.
Reduce Debuff Duration reduces the amount of time you are affected by time-based debuffs.
Both of the above are not important.
Stat Caps
Unlimited: Physical/Energy/All Basic Attack, Ignore Dodge, Elemental Damage, HP
250%: Recovery Rate
200%: Critical Damage, Elemental Resist
130%: Attack Speed, Movement Speed
75%: Dodge, Critical Rate
50%: Skill Cooldown, Ignore DefenseNote that some stats, namely Recovery Rate, Critical Damage, Attack Speed and Movement Speed, start at 100%. So while Attack Speed's cap is 130%, you only need to add 30% from various bonuses to reach the cap.
Gears and Uru
Gears and Uru
Gears themselves are fairly static: you just upgrade them from +5 to +15, then from +15 to +20 for Tier-2, then from +20 to +25 for Tier-3 or Transcend Potential.
However, there are two additional systems tied to gear upgrades that can be customised.
4th Gear Options
Every character's 4th gear will have a randomised blue stat that can be rerolled. Use this to build towards a stat cap for the most important stat that isn't currently capped - in order, these are:
Ignore Defense > Attack Speed > Critical Rate > Critial Damage
Note that for C.T.P. of Rage characters, or characters with innately high Dodge rate, you might want to roll Dodge as well. If you don't know what this means yet, don't worry.
Uru Slots
Each of a characters four gears have 5 Uru slots that fully unlock when it reaches +20 - individual Uru slots unlock before then, but don't do anything with them until all are unlocked. These slots allow you to place an Enchanted Uru in each one - with Enchanted Urus being resources that provide small buffs to specific stats.
The below image shows the Uru slots for a gear, with no Uru equipped.
There are some limitations to this: for each gear's 5 slots, only 2 equipped Urus can buff the same stat. This means you can have a maximum of 8 Urus buffing the same stat across the character as a whole (2 Urus per gear * 4 gears).
Equipping Urus
The first thing you should do, before equipping any Urus to a gear, is Amplifying the slots. Generally, settling for 4 slots Amplified is accepted to be the best balance of bonus stats vs. gold cost.
Next, equip the Urus themselves. 4-Star Urus are recommended for most builds, though if you have higher ranked Urus (or Odin's Blessings) lying around and you are building a character you will use a lot, throw them on.
As for the types of Urus to equip:
1. Equip 2 of the relevant Attack type Urus in two of the Amplified slots in each gear - 8 total.
2. Fill out the other slots with Urus until you reach the stat caps in the following order: Skill Cooldown > Ignore Defense > Attack Speed > Critical Rate > Critical Damage > HP (if all previous are capped).
It is your choice if you want to equip an Uru in the non-Amplified slot (assuming you haven't Amplified all slots). You get less than half of the stat bump you would equipping in an Amplified slot, so it can be seen as somewhat of a waste.
Odin's Blessings
Odin's Blessings are a premiunm version of regular Urus that provide larger stat bumps and 2 stats per Odin's Blessing. There are 17 different types of Odin's Blessing, each with two preset stats.
Each gear can only equip one Odin's Blessing of the same type, as opposed to 2 with regular Urus. As these are scarce, it is recommended to only equip them on the characters you get the very most use out of.
You can view the various types of Odin's Blessings at thanosvibs.money/blessings.
Skill Upgrades
Skill Upgrades
Skills Worth Upgrading
Main active skills 1-5 can be upgraded using Gold. However, this is pricey so you need to know which skills are worth levelling.
In general, only upgrade skills that offer a buff or debuff that scales by percentage as you upgrade it, or increases in duration as you upgrade it. These are usually found on skills 3, 4 and 5 in recent characters, but there are of course exceptions.
An example is shown below - notice how the Basic Attacks/Defenses buff increases by 1% each skill level. This meets the criteria above, so you'd want to upgrade it.
An exception to the rule is with damage-over-time debuffs such as Bleed, Shock, Burn, and so on. While these do increase by percentage, they're useless, so don't upgrade them. Another example below.
Skills that have no buffs or debuffs, or ones that do not change as the skill increases, should not be upgraded.
Skill Damage vs. Additional Damage
You might notice that all damaging skills have an "Additional [x] Physical/Energy Damage", which always increases as the skill is levelled (this can be observed in the two examples in the previous section).
The reason these are not worth levelling on their own is that they are a flat damage buff, so in the bottom one you'd deal 463 extra damage on that skill. While this doesn't sound bad, it is completely eclipsed by the "Skill Damage", which scales off Physical/Energy Attack.
Skill Damage (described in the line above the Additional Damage) never increases with skill level, only Additional Damage. It is for this reason that skills without buffs/debuffs that increase by percentage or duration are not worth levelling.
Type Enhancement
Type Enhancement
This system simply allows your character to deal more damage to, and take less damage from, enemies they have Type Advantage over (i.e. Speed -> Blast, Blast -> Combat, Combat -> Speed, Universal -> All Others).
Type Enhancement is unlocked when you Realise Potential for a character, and can be upgraded using Type Enhancement Kits (primarily farmed in Giant Boss Raid) or Type Enhancement Tickets (primarily farmed in Story Mode Ultimate - Dimensional Clash).
As you go up in Type Enhancement, the odds of succeeding in a regular (non-ticket) enhancement grows extremely low, and the Kits extremely hard or costly to farm. Thus, for most characters you actually use, bringing them to Rank 4 Type Enhancement will be enough.
Type Enhance Effects
All characters of the same type get the exact same Type Enhancement buffs for each rank. Below is an example of a Rank 6 (max level) Speed character's buffs - it is the same for Combat and Blast, just with the appropriate type they have advantage over.
As Universal characters have a less severe type advantage against Combats, Speeds and Blasts, the Type Enhancement reflects this - lower magnitude of buffs, but applies against all non-Universal types. This is a lot more versatile and useful, so if you have a high-rank Type Enhancement Ticket, a good Universal is likely to be the best use of it.
A Rank 6 (max level) Universal character's buffs are shown below.
ISO-8
ISO-8
ISO Sets
Each character has 8 slots where you can equip various colours of ISO-8 stones.
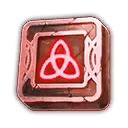
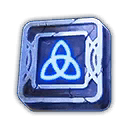
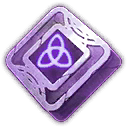
The first thing to do is to roll an "ISO Set". There are only three that are recommended: they are shown below.
(Note that Hawk's Eye is slightly worse in mid-game than the other two. However, as a newer player, it helps a lot if you lack Attack Speed and Cooldown Duration on your cards. You can always reroll it later.)
As ISO Set rolling is a huge Gold sink, it is recommended to keep the first of these three that you roll. Each ISO set then defines a specified colour combination of ISO-8 stones you must equip to fill out the Set Bonus - which for the "Attack Sets" listed above, gives you a 20-second attack boost approximately every minute, and a permanent increase of the 5 stats shown in orange.
For some reason this temporary attack increase also works for characters whose damage scales off HP (e.g. Victorious, Titan Hulk), so attack sets are still good in these cases.
Safe Equips
Since all three of these ISO sets share some colours in common, you can safely unequip one of each type shown below before you even roll a set. This is helpful if you are waiting for 50% ISO Set Reroll discounts, which happen once every update cycle (approximately 5 weeks).
ISO Upgrading
There are various ways of upgrading ISO-8 Stones.
- To Enhance ISO-8, you must sacrifice other ISO-8 stones. There are 5 ranks of ISO-8 Enhancement (+1 to +5), with each rank providing an increased stat buff.
- To Combine ISO-8, you need to have two ISO-8 of a specified colour and rank. Combining them turns the ISO-8 into one rank higher (e.g. Combining two 4-Star ISO makes one 5-Star), with the stat of the first ISO-8 used in the combine persisting.
- To Awaken ISO-8, you need to have a 6-Star ISO-8 at +5 enhancement. You can then sacrifice other 6-Star or higher ISO-8 to increase the number of red stars - for the first red star you need to use 1 6-Star ISO, two for the second, three for the third, and so on. Thus you need to sacrifice 21 6-Star ISO to fully Awaken a single ISO-8 stone manually.
As the ISO-8 equipped increases in Rank (both number of stars and number of red stars), the 20-second Attack boost provided by the Set Bonus will increase in magnitude, up to a maximum of +40% All Basic Attacks (when all 8 stones are fully Awakened).
ISO Stats
Each individual ISO-8 has a stat (or two stats, for Chaotic ISO-8) tied to it. They are all listed below.
Powerful ISO-8
Powerful ISO-8
Possible Stats: All Basic Attacks Increase, Physical Attack
If you are equipping this on an Energy Attack character, make sure it is rolled to All Basic Attacks, as Physical Attack will do nothing for them.Amplifying ISO-8
Amplifying ISO-8
Possible Stats: All Basic Attacks Increase, Energy Attack
If you are equipping this on an Physical Attack character, make sure it is rolled to All Basic Attacks, as Energy Attack will do nothing for them.Impregnable ISO-8
Impregnable ISO-8
Possible Stats: All Basic Defenses Increase, Physical Defense
Ideally these are rolled to All Basic Defenses, but it doesn't really matter that much.Absorbing ISO-8
Absorbing ISO-8
Possible Stats: All Basic Defenses Increase, Energy Defense
Ideally these are rolled to All Basic Defenses, but it doesn't really matter that much.Vital ISO-8
Vital ISO-8
Only rolls HP.
You end up accumulating a lot of these, as only Hawk's Eye of the three Attack sets uses this stone.Fierce ISO-8
Fierce ISO-8
Only rolls Critical Rate.
Nimble ISO-8
Nimble ISO-8
Only rolls Dodge.
You usually wouldn't equip any of these, as none of the three Attack sets uses this stone.Chaotic ISO-8
Chaotic ISO-8
Rolls two stats: an offensive stat and a defensive one.
The first stat should be a relevant Attack for the character you are equipping it on.
The second stat doesn't matter too much, but HP is ideal for most characters, and Dodge for characters with a CTP of Rage.
Artifacts
Artifacts
Artifacts are a relatively new system which deals with Instinct Damage.
Instinct
Instinct Attack/Damage is a separate "layer" of damage on top of regular "basic" Attack/Damage. If this is horribly confusing that's alright because Instinct, for now, is basically completely irrelevant.
Artifacts
There are two main types of Artifacts - generic ones, and character-specific ones. Only a limited pool of characters have character-specific Artifacts available for them, and they are very hard to get.
Artifacts can be enhanced using Celestial Essence. This is really only relevant at Tier-4, and if you have a good character-specific Artifact that benefits from additional Instinct. For any characters below Tier-4, enhancing Artifacts is probably not necessary.
Generic Artifacts
Generic Artifacts can be 1-Star to 3-Star, and can be equipped on any character, regardless of whether they have a character-specific Artifact. Each provides an increase to one of four Instinct types (ignore) and an additional passive, which aren't too useful for PvE.
It is a common misconception that generic Artifacts with increased damage to "Pure Evil" enemies help in World Boss Legend, due to the playable versions of Knull, Mephisto, Infinity Ultron and Gorr having the "Pure Evil" ability. However, this has been tested and confirmed by Netmarble to actually have no effect, as the WBL versions of these bosses have no abilities associated with them.
So ultimately it likely isn't worth equipping generic Artifacts for PvE purposes.
Character-Specific Artifacts
Character-specific Artifacts can be 3-Star to 6-Star, and are very hard to get in comparison to generic ones. Equipping a character-specific Artifact on the respective character unlocks a new Passive - this is fixed per character, and as the star level of the Artifact increases, the better the Passive.
Generally it's best not to worry about all the fine details. As new character-specific Artifacts are added each update there will not be a list here, but if you find a character-specific Artifact and it happens to activate a good Passive (or even if it's not a good Passive), just equip it on that character.
Note that there is currently no way to increase the stars on an Artifact.
You can find a list of all Character-Specific Artifacts on thanosvibs.money/artifacts.
Custom Gear
Custom Gear
Custom Gear is arguably the most important part of character building, so it's very important to understand what goes into it.
Part 5 of this Beginner's Guide provides much more detail about Custom Gear and its effects on gameplay. Below is a condensed description that focuses on Custom Gear only.
Obelisks
The generic form of Custom Gear are Obelisks. Obelisks can be 2-Star to 6-Star, but you'd only consider equipping one at 4-Star and above.
To upgrade an Obelisk, you sacrifice other Custom Gears to fill a percentage bar. Once the bar reaches 100%, the Obelisk increases by 1 Star, and rerolls its non-fixed stats.
A 6-Star (max rank) Obelisk can be "rerolled" by sacrificing another 6-Star Obelisk. This rerolls the randomised options, in the hopes that it rolls into a better one.
Obelisk Stats
Below is an example of a very good Obelisk.
There are two stat increases in the first two lines. The orange one is the "fixed stat", meaning that it persists (and can only roll higher) through Obelisk upgrading and rerolling. Thus, it is good to pick low-ranked Obelisks with good Fixed Stats, and upgrade them until they're good.
The second stat increase, in pale blue, is a randomised stat boost. This can be anything really and it's unlikely to be good, so don't worry too much about it.
The final few lines in the greenish-yellow are the "proc" - the most important part of the Obelisk, as it drastically increases the damage output of a character, especially if they are played well.
Note that in the general context of gaming, "proc" refers to any random process activating, so technically it could refer to many of the possible greenish-yellow rolls. In the context of Future Fight, however, it is usually just used to refer to the damage proc, as all the other ones are not worth mentioning.
Ideal Obelisk Rolls
Fixed Stat: Critical Damage, Ignore Dodge, Elemental Damage
Random Stat: Can be anything, but ideally one of the above. Who you choose to equip the Obelisk on can also depend on the random stat if it turns out good: for example, if you roll a Crit Damage fixed stat Obelisk and it gets Fire Damage and a good proc, you might reserve it for a Fire element character.
Proc: This should always be the exact wording above - Increases basic damage by x% for 1 attack(s). As getting good 6-Star Obelisks are hard for new players, equipping 4-Star Obelisks with any damage proc works as a placeholder, regardless of the other two stats.
Mini Rage
A relatively new Obelisk effect is the "Mini Rage" or "Anger" proc, which is called that due to its similarity to a C.T.P. of Rage's effect. However, it should be noted that the Mini Rage effect is far inferior to the C.T.P. of Rage effect (contrast with a Proc Obelisk which can reach the same proc magnitude as a C.T.P. of Energy or Destruction).
Its main difference to a proc is that it is active for the full 5 seconds. You can cancel as many skills as you want within that window: all damage will be increased for those 5 seconds. This makes it suitable for characters that aren't "proc-friendly", but the damage increase it offers just isn't very impressive.
The Mini Rage proc is worded something like: "Increases basic damage by 1% per 1% of
Rate, regardless of Guaranteed Rate." There are only very niche cases where the Mini Rage is better than a good Proc, even if a character isn't very proc-friendly. However, while you're new and good Obelisks are in short supply, it is definitely good to keep Mini Rages and equip them on the characters that are less proc-friendly.
Celestial Tech Packs
These are premium Custom Gear items with fully fixed stats, and additional effects that cannot be found in regular Obelisks.
See Part 4 - "C.T.P. Ranking" for more information, or view the CTP Stats page using the button below.
Uniforms
Uniforms
Many characters, especially ones that have been released ages ago, require uniforms to be useful. Once purchased, a uniform can be upgraded.
Every uniform starts at Normal rank and can be upgraded 5 times - Normal to Advanced to Rare to Heroic to Legendary to Mythic. The costs for each level vary by the type of character the uniform is for, and the cost of the uniform.
To view uniform upgrade infographics, you can check thanosvibs.money/uniforms.
Unlocking Uniform Options
Each time you upgrade a uniform, you gain a flat 2% increase to All Basic Attacks and Defenses (3% with double-cost uniforms), as well as revealing a "uniform option".
A uniform option unlocks if you own a certain other uniform tied to that option. For example, Silk's Summer Days uniform has Iceman [X-Men Blue] as its Advanced uniform option. This means that if you have Silk [Summer Days] at Advanced and you own that Iceman uniform, you unlock the Advanced uniform option. There would then be a different option uniform for Rare, Heroic, Legendary, and finally Mythic.
Each uniform has a pre-defined list of 5 other uniforms used as options. Again, viewing the uniform upgrade infographics at thanosvibs.money/uniforms is the recommended way to look these up.
Uniform Option Stats
The actual function of a uniform option is that each rank from Advanced to Mythic allows you to roll 1 stat boost from a pool of 5 stats. Importantly, the pool of stat boosts for each rank's option is the same across all uniforms (e.g. all uniforms have the same pool of stats for their Advanced options, etc.).
Additionally, upgrading the option uniform increases the amplitude of these stat boosts. A Mythic option uniform can give twice as many points towards a certain stat as a Normal uniform.
Listed below are the stat pools for each uniform option, per rank.
Advanced
Advanced
Stat Pool: Attack Speed, Movement Speed, Skill Cooldown, Crowd Control Time, Dodge
Best Rolls: Skill Cooldown > Attack Speed > DodgeRare
Rare
Stat Pool: Physical Attack, Energy Attack, Physical Defense, Energy Defense, HP
Best Rolls: The appropriate Attack type for the character.Heroic
Heroic
Stat Pool: Recovery Rate, Ignore Defense, Skill Cooldown, HP, Attack Speed
Best Rolls: Skill Cooldown > Ignore Defense > Attack Speed > HPLegendary
Legendary
Stat Pool: Physical Defense, Energy Defense, All Basic Defenses, Dodge, Movement Speed
Best Rolls: Dodge > All Basic DefensesMythic
Mythic
Stat Pool: Physical Attack, Energy Attack, All Basic Attacks, Critical Rate, Critical Damage
Best Rolls: The appropriate Attack type for the character (or All Basic Attacks).Since the Rare and Mythic options are the ones that offer Attack boosts, they can be seen as the two most important ones.
Best Practices
Uniform upgrades are a massive resource sink for a relatively minor boost to stats, so it can be safely ignored while you are still investing resources into building characters. Eventually you may begin upgrading uniforms for characters you like or play the most.
It is generally not advised to buy uniforms for the sole reason that they are options for an existing uniform you own: it simply isn't worth the crystals for 99% of players, and on top of that you need to upgrade the option uniform to get the most out of it. However, if you already own an option uniform and said uniform is cheap to upgrade, you may choose to rank it up to increase the main uniform's stat bump, especially if it's in the Rare or Mythic slot.
In general, just buy good uniforms as they come out, and upgrade uniforms as you have the resources to do so. Eventually new and good uniforms will start appearing that have your existing uniforms as options, in which case you can take advantage of the uniform option system.
PVP Builds
PVP Builds
If you are building characters for PvP, you might want to consider building more defensive stats. This section provides a rough rundown of what build modifications you might make for a PvP character - but realise that PvP builds aren't one-size-fits-all (for example, a "glass cannon" PvP character shouldn't be built the same way as a super tanky one).
Uru
Still equip two Attack Urus per slot, and prioritise capping Skill Cooldown.
After that, you might want to equip HP Urus, or Dodge for Dodge-heavy characters.
ISO-8
Many PvP characters will still work with the three Attack sets.
However, if you want to build a really tanky character, Protect the Captain, Binary Power and Drastic Density Enhancement can also be useful.
Artifacts
Good PvP characters usually have an Artifact Passive that helps them in that regard: for example Sersi's gives her a revive, which is very significant.
As for generic Artifacts, the ones that decrease Pierce Damage received are good for PvP. If the PvP character in question is more of a glass cannon that you are not building defensively, then increased damage to Leadership or Pure Evil may be ideal, based on which characters are in the meta at the moment.
Custom Gear
Custom Gear for PvP characters may prioritise HP on the fixed slot, and Invincibility instead of the x% damage proc.
However, there are a number of cheap PvP characters that will be viable even with a standard PvE Obelisk, so you'd need to find out what works for the character you are trying to build.
Uniform Options
Look for Dodge on the Advanced and Heroic slots, and HP on the Heroic (and maybe Rare, over Attack) slots.
